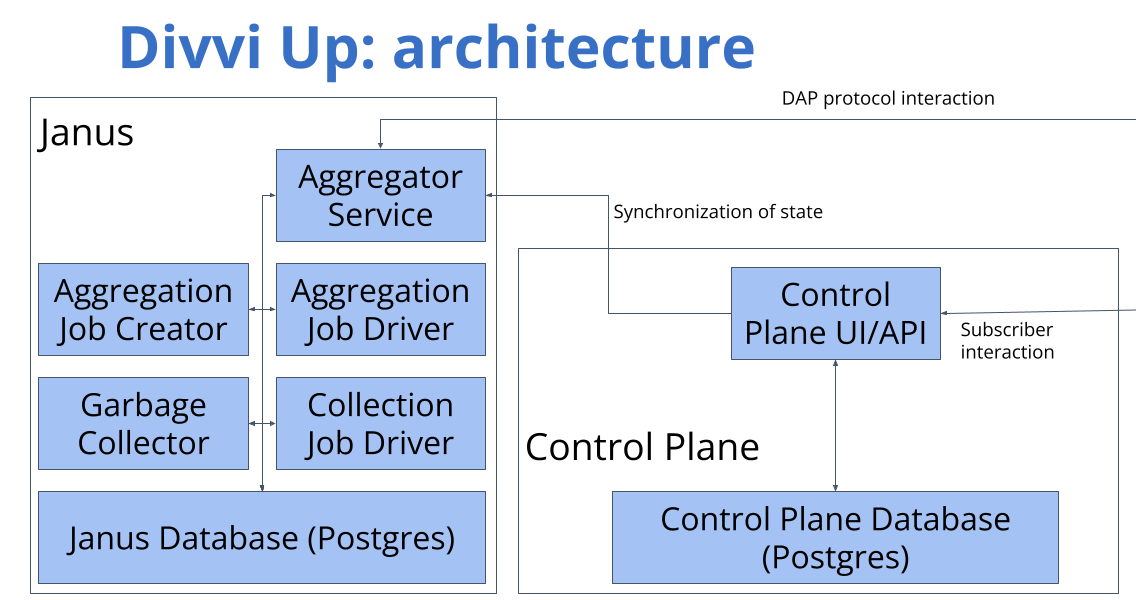
Divvi Up enables organizations to collect telemetry while preserving individual user's privacy. This is accomplished by coordinating two non-colluding service providers in a protocol called the Distributed Aggregation Protocol (DAP). But, to make it easy to test and develop against the Divvi Up system we are releasing a tutorial today that can set up the entire Divvi Up stack in a few commands.
Want to get to it? You can try out our command line tutorial for Divvi Up now or watch a video of the demo below. Or if you want some more behind the scenes on how all the divvi'ing happens, keep reading the rest of this post.
Behind the scenes
Services and Containers
Our production Divvi Up environments have processed hundreds of millions of reports a month. And so we have, through necessity, separated the Divvi Up service into a number of smaller services so we can quickly scale and debug our environments for customers. And each service is bundled into its own container image which is operated, in our production environments, under Kubernetes.
For the command line tutorial we use these same container images but configured via docker compose with the compose.yaml that we publish.

As an open source project we also provide docs on how to get started with compiling and running all of the Divvi Up components on the janus and divviup-api git repos.
Divvi Up command line tool
Divvi Up is designed to collect telemetry and integrate directly into your application with our TypeScript, Android, or Rust libraries (if you need different language bindings for your application please contact us!). These libraries are general purpose and should work with any server implementing the IETF's Distributed Aggregation Protocol (DAP).
However, to get started with the service, we created a new divviup command line tool which can both integrate with the DAP endpoints and the Divvi Up control plane to configure accounts, create tasks, upload telemetric data, and run aggregations more succinctly.
For example, uploading telemetric data can be done like this:
divviup dap-client upload --task-id $TASK_ID --measurement $measurement
Check out the full tutorial for explanations of the other important divviup subcommands.
Integrate your Application
If you do try out the tutorial and are ready to prototype an integration with your application you should now have everything you need to get started running locally.
If you have ideas or questions on how to integrate privacy preserving telemetry into your application we would love to hear from you via email contact@divviup.org.

